Apr 11, 2015

Syma X11 / Hubsan FC & MMW Fast motors Quadcopter Mod

The Syma X11 is one of my favorite quad's to fly. I enjoy flying the geared motor setup for its stability and efficiency. The stock setup gets about 12 minutes of flight on a 380mAh battery. However, the low yaw rates leaves a bit more to be desired. 

After watching Jordy RC on Youtube, his setup provided the best of both worlds. A Hubsan flight controller and upgraded motors from MMW. The Hubsan FC provides better yaw rates, and the option to turn on/off the LEDs during flight. 

Sidenote, if you're using a Deviation w/module transmitter, you'll get Telemetry data for the battery status--mine is set at 3.2V.

Materials:
Hubsan Transmitter

Steps:
  1. Disassemble Syma X11
  2. Remove motors and Syma FC
  3. Screw in Hubsan X4 FC. The Hubsan FC will not be a perfect fit, and you'll only be able to get one screw into the board. You can try some foam to reinforce the back of the board if you like.
  4. Transfer the gear pinion from the Syma motors to the MMW motors (or reuse the original Syma X11 motors if you don't want to upgrade to MMW)
  5. Insert motors into the frame
  6. Cut off the MMW connectors. Be sure to leave enough wire length to reach the Hubsan X4 board.
  7. Solder wires to the board (see photo below for wiring. Red and White are Positive +. Black and Blue are Negative -) Motor position are swapped. The wiring does not need to have reverse polarity, only positions swapped.
  8. Transfer LEDs over from the Syma FC to the Hubsan FC
  9. Reassemble the unit
  10. Swap the prop position from left to right
  11. Insert battery and test flight


Sep 10, 2014

How to add battleforthenet widget on Blogger

This code will add the battleforthenet widget to your blogger site.

1. Go to Layout
2. Add HTML/JavaScript widget
3. Copy/Paste:
<script src="//widget.battleforthenet.com/widget.min.js" async></script>
4. Save

Jul 23, 2014

64-bit Linux libXi.so.6 and libXtst.so.6 error fix

If you're running 64 bit Linux and you're receiving an error saying the file is not found, you may need the 32 bit files below.

Copied from the two sites below for reference:

http://stackoverflow.com/questions/17355863/cant-find-install-libxtst-so-6

Quoted:
Type:
$ sudo apt-get update
$ sudo apt-get install libxtst6
if this isn't OK.
Type:
$ sudo updatedb
$ locate libXtst
it should return something like:
/usr/lib/x86_64-linux-gnu/libXtst.so.6       # Mine is OK
/usr/lib/x86_64-linux-gnu/libXtst.so.6.1.0
If you do not have libXtst.so.6 but do have libXtst.so.6.X.X create a symbolic link:
$ cd /usr/lib/x86_64-linux-gnu/
$ ln -s libXtst.so.6 libXtst.so.6.X.X
Hope this helps.


http://stackoverflow.com/questions/22924339/chromedriver-on-ubuntu-12-04-error-while-loading-shared-libraries-libxi-so-6

Quoted:

libXi.so.6 is provided by libxi6. Chromedriver will then also ask for libgconf-2-4 with a similar message.
sudo apt-get install libxi6 libgconf-2-4
Whenever facing an issue of missing a specific file apt-file comes to rescue:
$ apt-file search libXi.so.6
libxi6: /usr/lib/x86_64-linux-gnu/libXi.so.6
libxi6: /usr/lib/x86_64-linux-gnu/libXi.so.6.1.0
libxi6-dbg: /usr/lib/debug/usr/lib/x86_64-linux-gnu/libXi.so.6.1.0
This can be installed via apt-get:
sudo apt-get install apt-file && apt-file update  # install and fill the index

Nov 5, 2013

Poor S&W Customer Service [M&P 15-22 Repair Unboxing] [Update: Thx S&W]

I love my S&W M&P 15-22, but if only S&W shared the same sentiment...

I purchased a brand new M&P 15-22 Performance Center Edition at the beginning of October. Took her to the range one time and had a great time. Then noticed the extension tube was bent, so I contacted S&W and they had the rifle shipped back to their repair center.

2 weeks went by and no communication was made. I received the rifle today, and to my surprise, no work was done on it. I will send this back again to get serviced.

Will update in a future video.


Update 11/6/13:
From S&W Facebook, they reached out to me and sent a prepaid label to ship the rifle back.

Update 11/8/13:
S&W followed up and said their engineers and production line people will look into this.

I bubble wrapped and shipped the lower back to S&W. In the box, I requested a new replacement lower.

Reports of crooked buffer tubes, during October, were reported on http://www.thetruthaboutguns.com/2013/10/robert-farago/question-of-the-day-more-guns-less-quality/

Update 12/4/13:
S&W Customer Service requests to send back the upper. I sent it with my FFL info. The lower was confirmed to be defective. They will now ship a new rifle.

Update 1/3/14:
I contact S&W CS for an update...

Update 1/16/14:
S&W CS replies asking for my FFL info. Also, they are "waiting on production to get one built.  It may take a few weeks due to the current large backlog." What happened over the last month?

I then contact S&W Facebook, and let them know of my displeasure of having to wait another few weeks for a rifle. It's now been 3 1/2 months.

Update 1/27/14:
S&W FB representative responds that he'll do whatever it takes to expedite the process. He gets the ball rolling in the right direction.

There is a disconnect in the level of customer service. S&W FB knows how to properly handle customer service in a friendly and professional manner. However, the warranty side does not. It would be good to have a status of a warranty repair, better communication through follow up/follow through.

Update 2/10/2014:
Rifle shipped out

Update 2/20/2014:
Received boxes of S&W swag. Knives, hats, and more. Thank you S&W for going above and beyond in customer service.

Update 2/21/2014:
After a 10 day wait from my FFL, the rifle was picked up, and all is well. The rifle shoots great, looks great. Buffer tube is now completely straight. S&W delivered, and then some. Thank you again Matt and S&W for the excellent customer service.

Oct 29, 2013

Jetbeam JET-I V2.0

Interface: 

The IBS circuit allows you to set three defined output states (A, B, C) through a continuously variable brightness mechanism similar to some Liteflux, EdgeTAC, and DBS lights. Interface is the same for all IBS models, and is as follows:

Mode Switching
Default settings for the three modes are: A is Default High, B is Default Low, and C is the warning signal/stobe. See my comparison data below for approximate estimates of the relative output levels. There is no memory mode - when switched on each time, the light enters mode A. Lightly press the tail cap button (i.e. quick flash), and the light will go from mode A -> B -> C in cycle. 

Changing the Brightness Level
To access the IBS cycle in any of the 3 modes, lightly press the tail cap button three or more times within one second in the mode you want to change. Now in “Brightness Setting” mode, the output will ramp in brightness from Min (5%) to Max (100%) gradually. Once it reaches Max, the light then starts over at Min and repeats the process. A complete cycle is supposed to take about 8 seconds according to the manual, but I’ve found that my engineering sample takes about twice that long (see Ramp graph below). During this process, the light flickers once at Min (5%), twice at 50% output; and three times at Max (100%). Simply turn off the light to select the output level you want, and leave it off for at least ~2 secs. It will then retain this setting the next time you turn the light back on.

Special Functions Mode
After entering the Brightness Setting mode of the Hidden Menu, lightly press the tail cap button once, and the light enters the Special Functions mode - which goes from 1HZ to 15HZ strobe, warning signal, standby signal, 100% SOS and 5% SOS. Again, if you want to select any of these functions, just turn off the light, wait 2 secs, and it will be set for the next time you turn on.

Reset Function
From the Special Functions mode, lightly press the tail cap button once and the light enters Reset mode. Turn the light off, wait 2 secs, and when it comes back on you will be in the factory set default A, B, C settings (i.e. A: Default High brightness; B: Default Low brightness; C: Warning Signal). 

Jul 20, 2013

First ride Phoenix II Electric Bike [2000W TOP SPEED]

A vlog of my first ride on a Crystalyte 4840 Brute 48V 2000W ebike kit. The ride was comfortable, destroyed the hills, tons of torque, and was a blast to ride. It's going to be my daily commuter going to and from work.

tl;dr I hit my top speed of 35.5mph without pedaling. Felt like I was going warp speed at 35mph--definitely did not expect that.

Please excuse the poor quality Bluetooth audio. My helmet cam failed, but the GoPro kept on truckin.

Marin Nail Trail 26" Hardtail MTB
48V LiMnCO2 10AH electricrider.com battery pack
4840 26" Rear electricrider.com brute kit W/LCD display
Twist grip throttle
Schwalbe 2.15" Marathon Mondial tires
SKS Grand MOM and Grand DAD fenders
Blackburn SPX-1 Ultimate Seatpost Rack

DIY Electric Bike - Building the Ultimate Commuter [UPDATED]

5/22/2013 - Where to Start

Between work, home life, and responsibilities, my personal time consists of my drive to work and my drive home. An 11 mile drive from work to home takes me 40 minutes on some days--that's California Bay Area traffic for you. I want to turn that time into something productive where I can bike to work to enjoy the outdoors, get exercise, and save money.

Production eBike vs DIY build
When I think of an eBike, I see myself flying up hills, feeling the adrenaline rush of torque, and the wind howling in my ears. Top speed is not so important for me but how fast I get to 20mph is. My time is limited. I like learning new things, but then again, I cannot dedicate time to experiment. Therefore, I want a bike that's quick to assemble, parts I can replace, and teaches me something while I build it. 

Comparing the production ebikes like the Stromer ST1, BH Emotion Neo Jumper, and a2b Metro/Octave resulted in prices around $4,000 with features like purpose built frames, high quality components, and pedal assist. From my reading, the power ranged from 250w-500w. The good thing about production bikes are that they're ready to ride, have a warranty, and can be well designed. The bad thing though is that they use proprietary technology, so if you have issues, you'll have to go back to the manufacturer. Also, upgrading the ebike takes a lot effort and time.

My plan is to purchase a bike and an eBike kit from a USA distributor, assemble, and document the challenges and fun of commuting via an eBike to work. I like the idea that I can replace parts if they break, and the power per dollar is better in an eBike kit when compared to a production ebike.

Stromer ST1

BH Emotion Neo Jumper


a2b Metro/Octave
The $10,000 Stealth Bomber

5/23/2013 - Purchased the bike

'06 Marin Nail Trail


Looking through Craigslist ads was fun. Imagine the possibilities. I started my search dead set on getting a downhill race bike because I liked the full suspension and loved the look of the front forks. However, after thinking about the initial cost, maintenance for the suspension, and battery placement, I ended up going with a '06 Marin Nail Trail hardtail mountain bike. I figure the hardtail mtb triangle is plenty big for the battery, and the price of the bike will provide flexibility when I choose the motor kit and battery.

Next on my list will be a full tune up for the bike, and a possible brake upgrade.

5/24/2013 - Purchase rear brake

$81.45 Picked up a Hayes Stroker Trail hydraulic brake to replace the aging rear Hayes Nine brake. http://ebikestop.com

6/6/2013 - Accessories installation

Installed:
An old bell ringer
Stroker trail rear hydraulic brake (front brakes were stroker trail brakes when I purchased the bike)


Giro Remedy 2013 Full Face Helmet made from fiber glass. Check out the unboxing:


6/24/2013 - 48V 10AH LiMnCO2 battery fitment

My electricrider.com battery arrived today. Before purchasing the battery, I used the spec off of electricrider's website to estimate the fitment in the triangle. Luckily, it's a perfect fit with some extra space for some padding. Now I can move forward and pick up a triangle battery bag to house the battery.

Top view of the 48V 10AH electricrider.com battery
Side view of the 48V 10AH electricrider.com battery

6/26/13 - Battery Box Enclosure

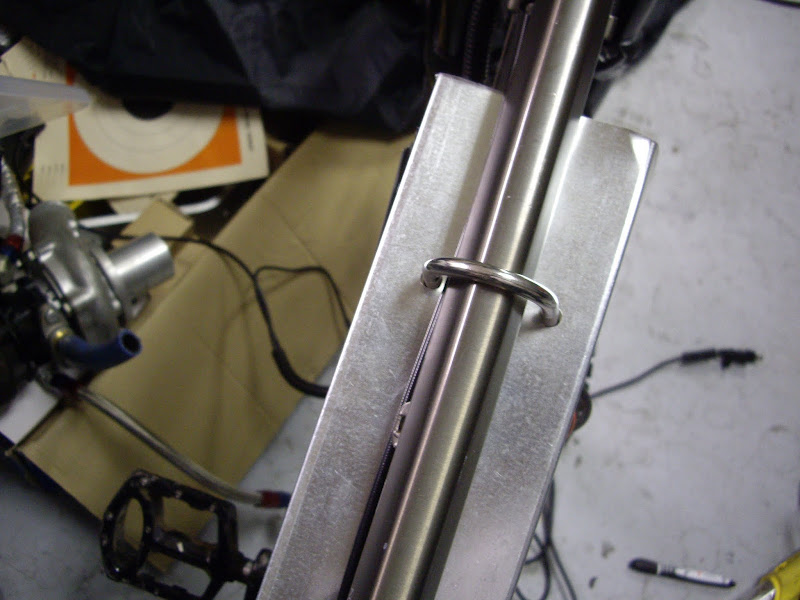
I used a 3-5/8 in. x 10 ft. 25-Gauge Galvanized Steel Wall Framing Stud and stainless steel U bolts to build the battery enclosure. The parts were picked up from Home Depot. 

Tools:
Metal shears
Dremel

ElectricRider.com 48V 10AH LiMnCO2 battery fitment

Cut the metal with some metal sheers
Cut an aluminum 90 degree bar to use as an edge to bend the metal
Bent into shape the battery enclosure
Test fitted the enclosure
Drilled holes for the U bolts

6/29/13 - Installed the kit


Parts parts parts
Test fitted the controller--this location ended up hitting my legs when pedaling 
Kit installed


7/2/13 - Rear rack & fenders

SKS Grand MOM and Grand DAD fenders
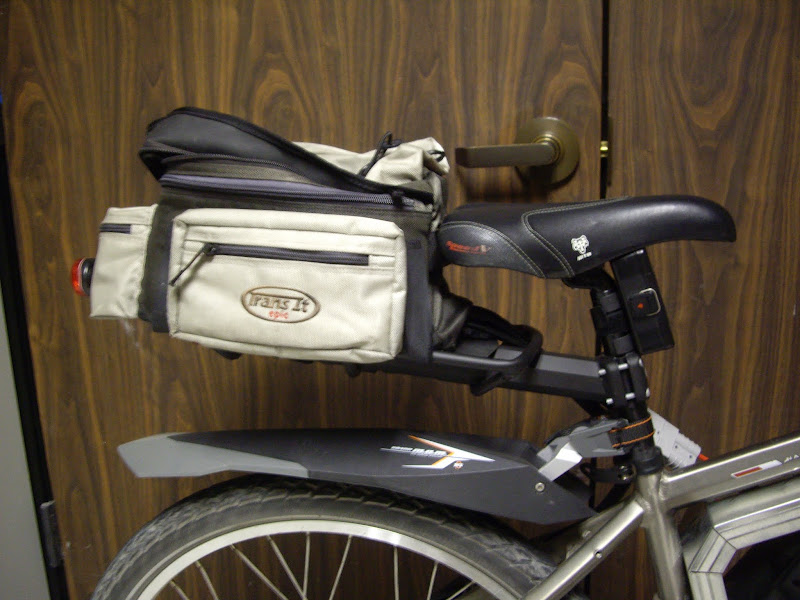
Blackburn SPX-1 Ultimate Seatpost Rack

Used wire loom to hide the wiring, and routed the wires to the seatpost rack


7/6/13 - First ride


The ride was comfortable, destroyed the hills, tons of torque, and was a blast to ride. It's going to be my daily commuter going to and from work. 

Felt like I was going warp speed when I hit the top speed--definitely did not expect that. 

Please excuse the poor quality Bluetooth audio. My helmet cam failed, but the GoPro kept on truckin.

Marin Nail Trail 26" Hardtail MTB
48V LiMnCO2 10AH electricrider.com battery pack
4840 26" Rear electricrider.com brute kit W/LCD display
Twist grip throttle
Schwalbe 2.15" Marathon Mondial tires
SKS Grand MOM and Grand DAD fenders
Blackburn SPX-1 Ultimate Seatpost Rack

7/7/13 - Added CRG mirror and Crampbuster


Crystalyte APM display - Battery meter, Speed, Efficiency, Torque, RPM and more

7/19/13 - Pletscher Double Kickstand

Added a much needed kickstand. The great thing about the Pletscher double kickstand is that it folds up into a single kickstand making it compact and looking slick.

8/24/2013 - Carbon Fiber battery reinforcement

On my setup, the battery's weight sits on one of the corners in the battery enclosure. My concern was the weight would put pressure on the battery cell, and riding over bumps would cause the cell to eventually get crushed.

I went ahead and added a single layer of 5.8oz carbon fiber and epoxied it to stiffen up the two bottom corners.

The batter is now solid.

*********************************************************************************

Useful eBike Links


*********************************************************************************

Quantification of Car vs. eBike

http://imadethisdesign.blogspot.com/2013/05/quantification-of-car-vs-ebike.html

*********************************************************************************