Showing posts with label How to. Show all posts

Sep 7, 2022

fail2ban unban command

fail2ban-client -i
then in interactive mode type read the status of a jail:
status sshd
you'll get:
Status for the jail: ssh
|- Filter
|  |- Currently failed: 0
|  |- Total failed: 3
|  `- File list:    /var/log/auth.log
`- Actions
   |- Currently banned: 1
   |- Total banned: 2
   `- Banned IP list:   192.168.0.100
then type in fail2ban interactive mode:
set sshd unbanip 192.168.0.100
you'll get:
192.168.0.100
it means no longer 192.168.0.100 in ban list.

Oct 11, 2019

Fixed: Dell iDRAC6 SMTP Email Alert Settings

Goal: get email notifications sent from a Dell Poweredge with iDRAC6 when a server issue occurs.

Problem: "Email not sent." is the message displayed after clicking Send Test Email.

Solution: 
  1. iDRAC Settings > Network/Security > Enter your DNS Domain Name (ex. yourdomain.com)
  2. iDRAC Settings > Network/Security > Set DNS Servers (this is so external SMTP domains can be translated)
  3. Apply
  4. System > Alerts > Click Enabled for Enable Platform Event Filter Alerts
  5. Apply
  6. System > Alerts > Email Alert Settings > Enter destination email and Email Description
  7. System > Alerts > Email Alert Settings > Enter in either your internal email server or external email relay. iDRAC 6 does work with external email relays outside of your organization.
  8. Apply
  9. System > Alerts > Email Alert Settings > Click Send to Test E-Mail
A successful email will be sent:

Subject: Alert from iDRAC

Message: [DELL IDRAC WARNING]
Message: TEST PAGE
Event: Email paging test to user.
Date: 10/11/2019
Time: 13:41
Severity: Info/Normal

Apr 13, 2015

DIY Reclaimed Wood Mini Pallet Bike Rack


DIY Recycled Mini Pallet Bike Rack
Complete
All wood reclaimed from a wood pallet
Measure the distance from the bike top tube and the bike seat. Confirm that you will have enough clearance to the ceiling after hanging the bike to the rack. Then calculate the minimum amount of distance from the wall to the hanging point. Cut wood to size.
Nail the frame. Then attach top and bottom pieces of wood using nails.
Attach to wall using L bracket and 70 pound drywall anchors. Note: my measurements were off and the seat post is just barely hitting the ceiling. 
Use section of pallet with HT stamp to complete the original "pallet look"


Originally built July 24, 2014. Still hanging on strong.


Sep 10, 2014

How to add battleforthenet widget on Blogger

This code will add the battleforthenet widget to your blogger site.

1. Go to Layout
2. Add HTML/JavaScript widget
3. Copy/Paste:
<script src="//widget.battleforthenet.com/widget.min.js" async></script>
4. Save

Jul 20, 2013

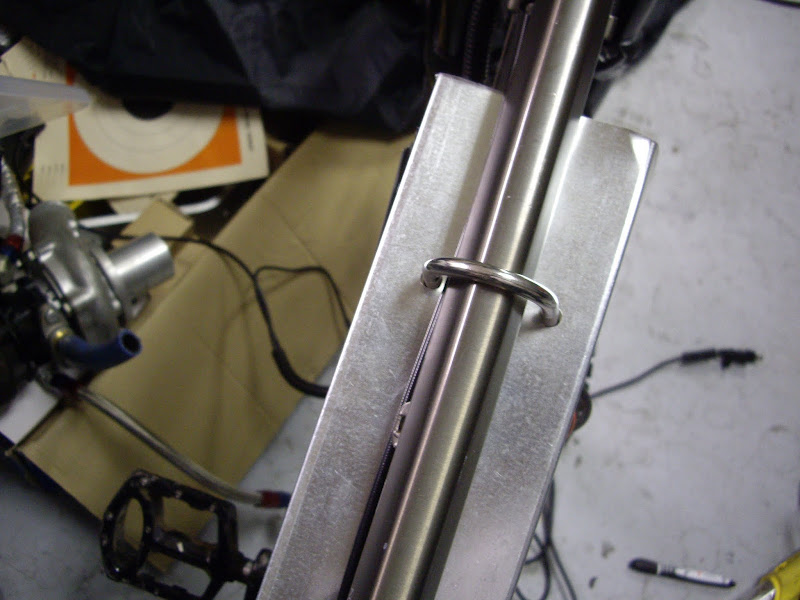
DIY Electric Bike - Building the Ultimate Commuter [UPDATED]

5/22/2013 - Where to Start

Between work, home life, and responsibilities, my personal time consists of my drive to work and my drive home. An 11 mile drive from work to home takes me 40 minutes on some days--that's California Bay Area traffic for you. I want to turn that time into something productive where I can bike to work to enjoy the outdoors, get exercise, and save money.

Production eBike vs DIY build
When I think of an eBike, I see myself flying up hills, feeling the adrenaline rush of torque, and the wind howling in my ears. Top speed is not so important for me but how fast I get to 20mph is. My time is limited. I like learning new things, but then again, I cannot dedicate time to experiment. Therefore, I want a bike that's quick to assemble, parts I can replace, and teaches me something while I build it. 

Comparing the production ebikes like the Stromer ST1, BH Emotion Neo Jumper, and a2b Metro/Octave resulted in prices around $4,000 with features like purpose built frames, high quality components, and pedal assist. From my reading, the power ranged from 250w-500w. The good thing about production bikes are that they're ready to ride, have a warranty, and can be well designed. The bad thing though is that they use proprietary technology, so if you have issues, you'll have to go back to the manufacturer. Also, upgrading the ebike takes a lot effort and time.

My plan is to purchase a bike and an eBike kit from a USA distributor, assemble, and document the challenges and fun of commuting via an eBike to work. I like the idea that I can replace parts if they break, and the power per dollar is better in an eBike kit when compared to a production ebike.

Stromer ST1

BH Emotion Neo Jumper


a2b Metro/Octave
The $10,000 Stealth Bomber

5/23/2013 - Purchased the bike

'06 Marin Nail Trail


Looking through Craigslist ads was fun. Imagine the possibilities. I started my search dead set on getting a downhill race bike because I liked the full suspension and loved the look of the front forks. However, after thinking about the initial cost, maintenance for the suspension, and battery placement, I ended up going with a '06 Marin Nail Trail hardtail mountain bike. I figure the hardtail mtb triangle is plenty big for the battery, and the price of the bike will provide flexibility when I choose the motor kit and battery.

Next on my list will be a full tune up for the bike, and a possible brake upgrade.

5/24/2013 - Purchase rear brake

$81.45 Picked up a Hayes Stroker Trail hydraulic brake to replace the aging rear Hayes Nine brake. http://ebikestop.com

6/6/2013 - Accessories installation

Installed:
An old bell ringer
Stroker trail rear hydraulic brake (front brakes were stroker trail brakes when I purchased the bike)


Giro Remedy 2013 Full Face Helmet made from fiber glass. Check out the unboxing:


6/24/2013 - 48V 10AH LiMnCO2 battery fitment

My electricrider.com battery arrived today. Before purchasing the battery, I used the spec off of electricrider's website to estimate the fitment in the triangle. Luckily, it's a perfect fit with some extra space for some padding. Now I can move forward and pick up a triangle battery bag to house the battery.

Top view of the 48V 10AH electricrider.com battery
Side view of the 48V 10AH electricrider.com battery

6/26/13 - Battery Box Enclosure

I used a 3-5/8 in. x 10 ft. 25-Gauge Galvanized Steel Wall Framing Stud and stainless steel U bolts to build the battery enclosure. The parts were picked up from Home Depot. 

Tools:
Metal shears
Dremel

ElectricRider.com 48V 10AH LiMnCO2 battery fitment

Cut the metal with some metal sheers
Cut an aluminum 90 degree bar to use as an edge to bend the metal
Bent into shape the battery enclosure
Test fitted the enclosure
Drilled holes for the U bolts

6/29/13 - Installed the kit


Parts parts parts
Test fitted the controller--this location ended up hitting my legs when pedaling 
Kit installed


7/2/13 - Rear rack & fenders

SKS Grand MOM and Grand DAD fenders
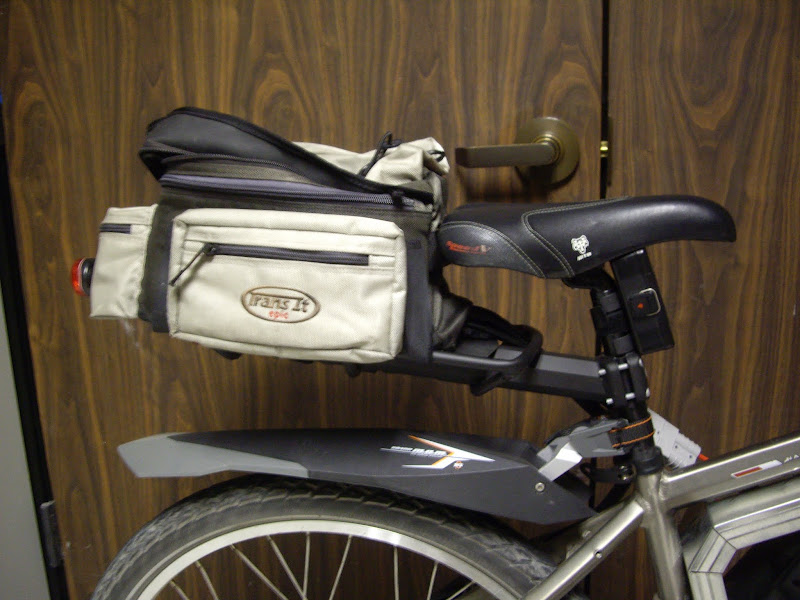
Blackburn SPX-1 Ultimate Seatpost Rack

Used wire loom to hide the wiring, and routed the wires to the seatpost rack


7/6/13 - First ride


The ride was comfortable, destroyed the hills, tons of torque, and was a blast to ride. It's going to be my daily commuter going to and from work. 

Felt like I was going warp speed when I hit the top speed--definitely did not expect that. 

Please excuse the poor quality Bluetooth audio. My helmet cam failed, but the GoPro kept on truckin.

Marin Nail Trail 26" Hardtail MTB
48V LiMnCO2 10AH electricrider.com battery pack
4840 26" Rear electricrider.com brute kit W/LCD display
Twist grip throttle
Schwalbe 2.15" Marathon Mondial tires
SKS Grand MOM and Grand DAD fenders
Blackburn SPX-1 Ultimate Seatpost Rack

7/7/13 - Added CRG mirror and Crampbuster


Crystalyte APM display - Battery meter, Speed, Efficiency, Torque, RPM and more

7/19/13 - Pletscher Double Kickstand

Added a much needed kickstand. The great thing about the Pletscher double kickstand is that it folds up into a single kickstand making it compact and looking slick.

8/24/2013 - Carbon Fiber battery reinforcement

On my setup, the battery's weight sits on one of the corners in the battery enclosure. My concern was the weight would put pressure on the battery cell, and riding over bumps would cause the cell to eventually get crushed.

I went ahead and added a single layer of 5.8oz carbon fiber and epoxied it to stiffen up the two bottom corners.

The batter is now solid.

*********************************************************************************

Useful eBike Links


*********************************************************************************

Quantification of Car vs. eBike

http://imadethisdesign.blogspot.com/2013/05/quantification-of-car-vs-ebike.html

*********************************************************************************

May 22, 2013

Useful eBike Links

*********************************************************************************

Links:

YPedal's Intro to eBikes:
http://ypedal.com/rant/rant.htm

FAQ
http://endless-sphere.com/forums/viewtopic.php?f=3&t=26488

Choosing a frame:
http://www.electricbike.com/suspension/
https://www.phasorcycles.com/

 Phasor Frame Made in the USA

Battery Supplier:
http://endless-sphere.com/forums/viewtopic.php?f=14&t=47894&p=704750&hilit=electricrider#p704750
http://myworld.ebay.com/sun-thing28
http://www.batteryspace.com/custom-linimnco-battery-36v-18ah-648wh-40a-rate-with-pcm-for-e-bike-54.aspx

Tires:
http://endless-sphere.com/forums/viewtopic.php?f=3&t=37963&start=25

http://endless-sphere.com/forums/viewtopic.php?f=11&t=20282

http://www.amazon.com/CST-Cyclops-Tire-2-4-BLK/dp/B002SG53RE/

Kits:
Electric Rider - USA
http://electricrider.com/crystalyte/index.htm

e-BikeKit - USA
My brief customer experience with e-bikekit.com was excellent. Communication was fast and top notch here. Well known on the internet for their 5 star customer service.
http://www.e-bikekit.com/

FalconEV - USA
http://www.falconev.com

Conhis Motor - China
http://conhismotor.com/

Bike Maintenance
http://www.webmountainbike.com/maintenance.html 

Production eBikes
http://www.evelo.com/
http://www.stromer.ch
http://ultramotor.com
http://www.bh-emotion.co.uk/

Motors:
http://www.electricbike.com/crystalyte-hub-motor/
http://www.methtek.com

Torque Arms
http://endless-sphere.com/forums/viewtopic.php?f=2&t=26444
http://endless-sphere.com/forums/viewtopic.php?f=31&t=49635

Accessories:
Storage in the triangle http://www.amazon.com/Ibera-Bicycle-Triangle-Frame-Large/dp/B006JA8WEG
http://em3ev.com/store/index.php?route=product/product&path=41&product_id=125

Mount Battery Ideas:
http://endless-sphere.com/forums/viewtopic.php?f=3&t=12847

Other:
http://www.fallbrooktech.com/nuvinci-technology

Maintenance
https://www.youtube.com/watch?v=LNzN9oTQA8s

*********************************************************************************

Jan 31, 2012

Dolphin HD reopen a closed tab [How To]

The Dolphin HD reopen a closed tab feature is real nifty...if you can find it. Because it wasn't so obvious for me. Long press an open tab, and a menu will pop up with the option to reopen a closed tab.

Happy browsing


Jan 4, 2012

[OUTDATED] Unlimited Free Text Messaging :: GV :: Boost Mobile iDEN


So by now, you're having a blast with your GPS tracker/free internet boost mobile phone. Well, we're going to kick it up a notch with free unlimited text messaging through Google Voice.

Here's how it works:
We're going to use the Boost Mobile iDEN Pay-As-You-Go phone network to access the internet--this is free and we do not need a data plan. Then we'll use Opera Mini Browser to visit http://voice.google.com. Once logged in, we're free to make and receive text messages through the browser.

The cost breakdown is $10 every 3 months for unlimited free text messaging/GPS tracking/free internet/tethering/emergency phone.

Dec 8, 2011

How to install Siphon SIP for iPhone, iPod, iPad

(image from Siphon)

This tutorial is applicable for iOS 4.1 or later, but not 5.
You must have Cydia before proceeding:

Instructions:
  1. Install Cydia
  2. Install iFile
  3. Download your favorite release from http://code.google.com/p/siphon/downloads/list?can=1&q=&colspec=Filename+Summary+Uploaded+ReleaseDate+Size+DownloadCount
  4. Email the file you just downloaded to yourself
  5. Open up your email
  6. Touch the file to download it
  7. Once the download is complete, open in iFile
  8. Click on the file in iFile
  9. Select Install
  10. Once the installation is complete, an Siphon icon will display, and if not, use your App search to find it, then Siphon will display on your springboard
  11. Enjoy

Dec 5, 2011

XBMC & Nvidia VDPAU on Ubuntu 11.10 with working Sound over HDMI


I've successfully built another XBMC Ubuntu 11.10 machine with sound over HDMI thanks to various internet resources and some good ole troubleshooting. Sound is audible through the Internet Browser as well as through XBMC, so we have system sounds as well as movie sounds enabled. 

My system plays 1080p and 720p movies smoothly with almost no CPU utilization e.g. a 15 gigabyte 1080p Blu-ray rip runs perfectly smooth. Nvidia's VDPAU handles all of the HD processing, and the video is stunning. Also, XMBC's AEON skin is just as beautiful. Note: Adobe's Flash 11 has numerous bugs in its current state, so it does not work 100% with this build, and it seems slightly more stable in Firefox than in Chrome.

This tutorial should work for Nvidia hardware users as well as give some troubleshooting ideas for ATI users.

Tutorial

My Setup:
Acer Revo R1600 (stock and unmodded)
Nvidia ION LE
Ubuntu 11.10 64-bit
HDMI

Instructions:

1. Install Ubuntu 11.10

2. Get the Nvidia driver
How To Install Nvidia 275.09.07 Driver in Ubuntu 11.10 Oneiric Ocelot?

3. Install XBMC
Install XBMC on Ubuntu 11.10 Oneiric Ocelot/Linux

4. Getting Sound to play over HDMI may take several steps:

First, check to see if sound is enabled and unmuted. SPDIF should be unmuted as well:


"Code:
alsasmixer
Press <F6> to select the correct soundcard.
Press <F3> to show playback levels. <F4> selects capture levels [or use <Tab>]
Use the left/right arrow keys to select and up/down arrow keys to change levels. <M> to mute/unmute.
Go to "System ->Preferences ->Sound" and make sure the correct soundcard is default and adjust your profile on the hardware tab. 
On the output tab choose the correct device."
Then we'll check to see where our sound device is located by:
Code:
aplay -l
(Mine was 0,3)

Next, we'll load a module to finally get system sounds working:

From Ubuntuforums user efflandt on http://ubuntuforums.org/showpost.php?p=10367062&postcount=5 (I've modified the hardware location to match my hardware 0,3) :

"
Code:
aplay -D plughw:0,3 /usr/share/sounds/alsa/Front_Center.wav
Mine is 0,3 so I added a line to /etc/pulse/default.pa after alsa-sink line:

Code:
#load-module module-alsa-sink
load-module module-alsa-sink device=hw:0,3
Reboot. The only odd thing it that in the Output tab of Sound Preferences you will need to select the HDA NVidia device that does NOT say HDMI to get HDMI sound. The speaker test in Sound Preferences will not work, but if you play Rythmbox, etc. you should be able to switch sound output on the fly."

Lastly, we're going to enable HDMI sound in XBMC

Select HDMI in Audio Output
Under Audio Output Device, select Defaults
For passthrough sound to your receiver, choose the setting your setup requires.

Now get some popcorn going, sit back, and enjoy your HTPC!

Troubleshooting & Tips

Fix Video Tearing:

Overscan compensation:

Enable HD flash
http://ubuntuforums.org/showthread.php?t=1685845

Change icon size
http://www.upubuntu.com/2011/10/how-to-resize-gnome-shell-icons-in.html

Change font sizes (just change the DPI for bigger fonts)
http://ubuntuforums.org/showthread.php?p=11484414

Autologin
http://www.groupofnowhere.com/2011/10/19/xubuntu-11-10-oneiric-ocelot/

Dec 1, 2011

DIY GPS Handlebar Mount Tutorial

(image: Tri's DIY GPS handlebar mount on an Aprilia Tuono)

The goal of this post is to give you an idea on how to create your own GPS handlebar mount. The core build of this DIY GPS mount should be applicable to anything with handlebar like a motorcycle, bicycle, scooter or ATV. The size and shape of the DIY GPS mount will vary depending on your needs such as the size of your GPS and handlebars. Overall, I've used this GPS mount on two motorcycles with great results.

Materials to build 1 mount:
Aluminum Flat Bar at Home Depot
2 Halex 3/4 in. Steel Conduit and Pipe Hangers #26781, (in the electrical isle of HD)
Velcro
2 Hex bolts
2 Nuts
2 Washers
2 Locking washers
Plumber's Teflon Tape

Bill of Materials:
~$15

Tools:
Dremel or Hack Saw
Drill
Sanding block
Scissors
Dry erase marker

Tutorial:

1. Gather your build materials from Home Depot.


2. Choose a good mounting location and make note of how much space you have to work with. Will the GPS mount fit?

3. Cut your aluminum bar to the size of your GPS using either a Dremel or hacksaw, and sand the edges smooth


4. Place the conduit hanger holes side by side, and place them together onto the aluminum bar. Mark your drill holes with your Dry erase marker.

5. Drill out the two holes


6. Tighten and screw in the nuts and bolts with the washer and locking washer.


7. Optional. Drill out a pair of holes to attach some Velcro straps.

8. Mount the GPS holder to your handlebar by unscrewing the Speed Thread on the Conduit Hangers. 

9. Add some  plumber's Teflon thread tape to protect your handlebar from scratches. 

10. Pull the hangers apart and mount it to your handlebar. Put back the screw and tighten down.


11. Cut some velcro and add it to the front of the GPS holder and to the back of your GPS.


12. Mount your GPS to your new DIY GPS mount. Now start on your next adventure!